PHOTOGRAPHS BY DAVID ENGELHARDT STYLING BY DANNY SEO CRAFTS BY CAYLIN HARRIS
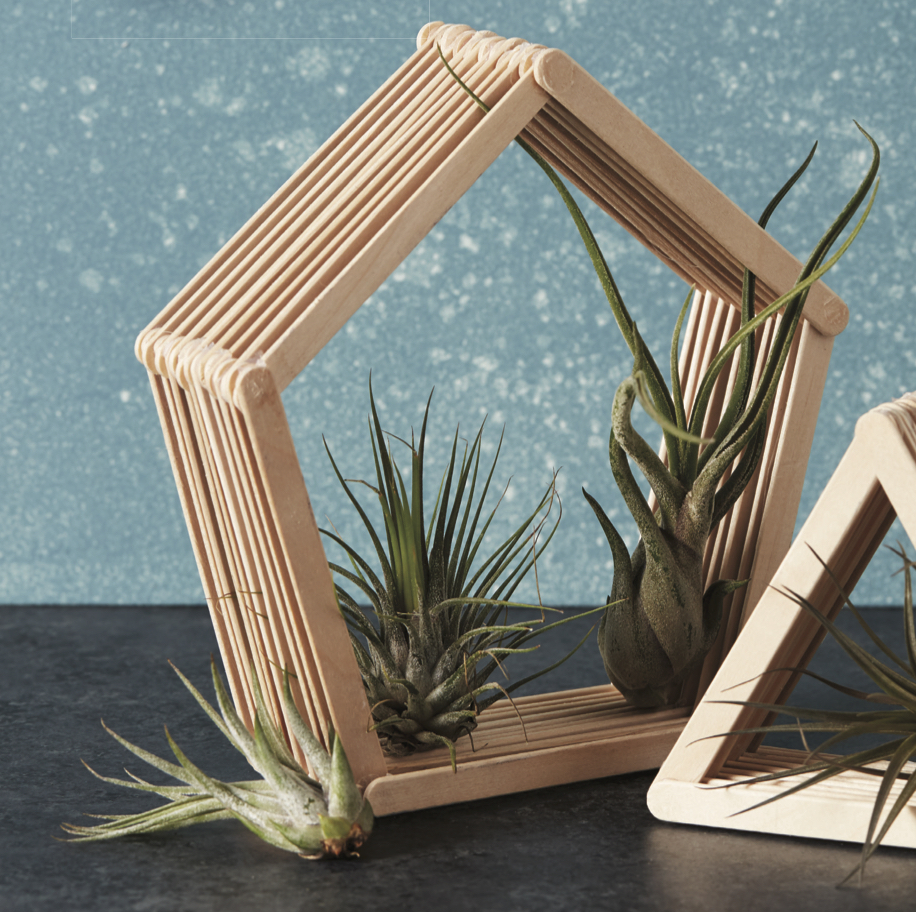
AIR PLANT HOLDER
TIME TO MAKE: 15 MINUTES
Air plants are all the rage right now because they are so easy to grow. They thrive by absorbing moisture and nutrients right out of the air! To make this modern holder, all you need are wooden popsicle sticks and a glue gun. Make any shape you want; just glue one stick to the other and repeat the pattern. Tuck in an air plant between the sticks so they’re snug and secure. You can display on top of a table or hang with string in a window.
good to know
A steamy bathroom is a great place to grow an air plant.
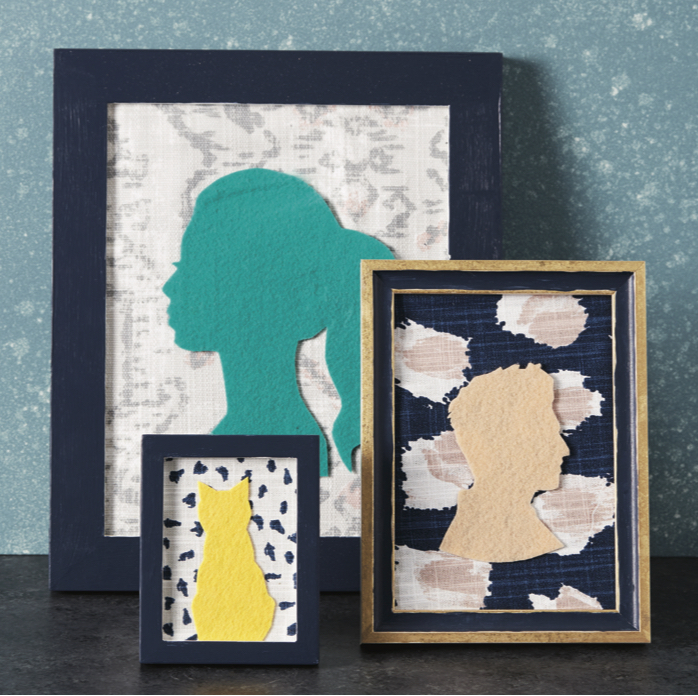
SILHOUETTE ART
TIME TO MAKE: 1 HOUR
Mismatched picture frames can be found for next to nothing at thrift stores such as Goodwill and The Salvation Army. Create a cohesive grouping by painting them in the same color. Pop out the glass and cover it with a fabric remnant. Simply glue the remnant on top of the glass and cut the excess fabric. Pop it back into the frame, fabric side up. Trace a silhouette (we found images online) on felt fabric and glue right onto the fabric.
good to know
Take a selfie and print it out on paper to make a silhouette portrait of yourself to give as a gift.
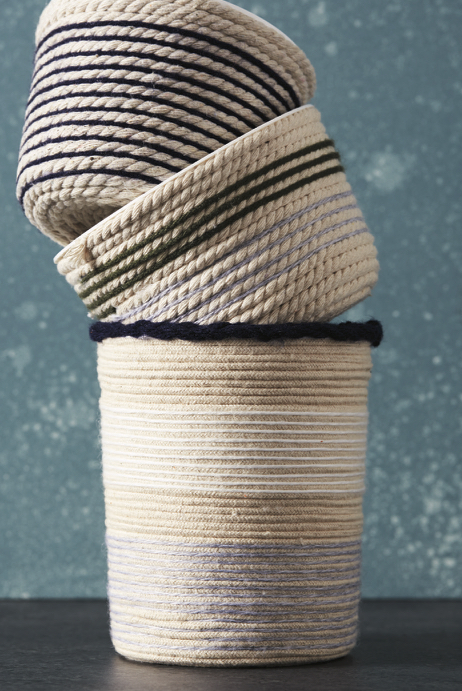
COILED BASKET
These nautical-inspired rope baskets are made from two humble, utilitarian items: rope and a plastic bucket. Don’t run to the store to buy a new plastic bucket. Instead, recycle an old paint bucket or even a warehouse club container for this project. It’s easy to make: Just dab hot glue on the center of the bucket’s bottom and attach the rope. Keep coiling and gluing around and around, working your way up the sides of the container until the whole thing is completely covered.
good to know
To fill gaps, run a smaller rope or string in between to hide any plastic and to give it a striped effect.
TIN CAN ORGANIZERS
TIME TO MAKE: 15 MINUTES
This is the simplest craft—and it has the most functional result. All
you need are empty tin cans (these once held beans, tomato paste, and soup). Give them a thorough cleaning and dry them completely. Cover the outside of the cans with a combination of decorative paper, washi tape, cork contact paper, and string. It’s an easy craft so make lots of organizers to keep things like crafting and office supplies tidy and accessible.
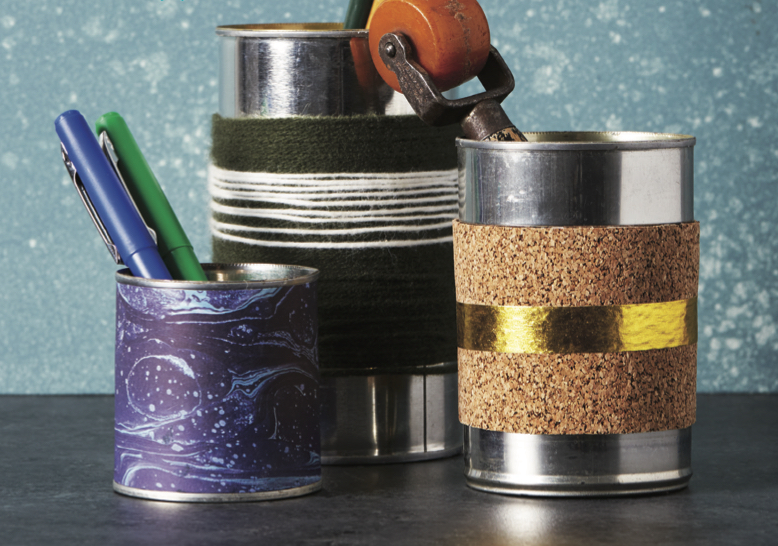
good to know
An electric can opener will assure that the opening has a flat edge. If the can’s edge is sharp, use coarse sandpaper to smooth it out.

K-CUP CANDLE HOLDERS
TIME TO MAKE: 5 MINUTES; 24 HOURS TO DRY
I’m not a fan of disposable plastic coffee K-Cups, but if you see a few in the office trash, fish them out for this craft. Simply rip off the top and empty the contents. Then fill the plastic cup with wet concrete (we used Quikrete brand). Wait 20 minutes for the concrete to set, then place a taper candle in the center. Let it dry overnight, remove the candle, and peel off the K-Cup to reveal your finished candle holder.
good to know
It’s possible to add a drainage hole when dry. Just use a cordless drill with a 1⁄4–inch bit to make a small hole through the bottom. Take your time to avoid cracking the pot in half.
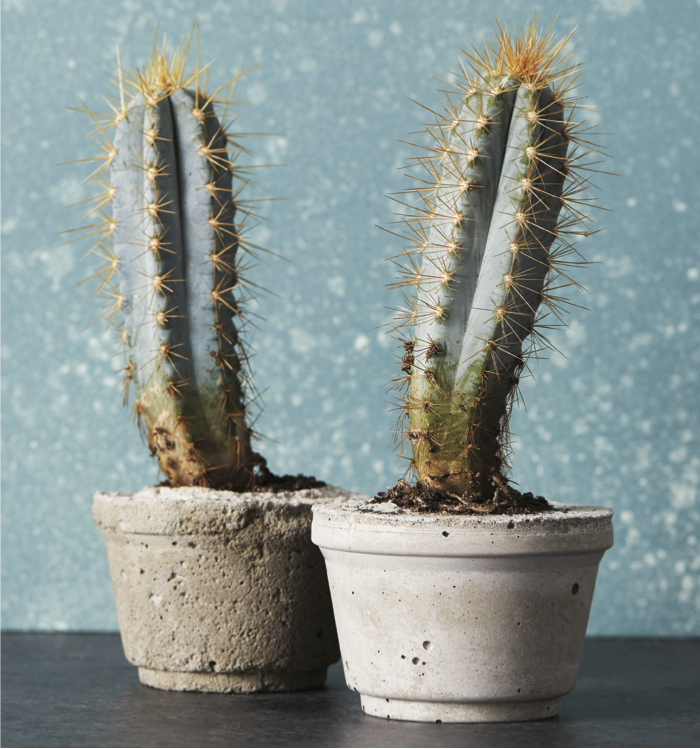
CONCRETE CACTI POTS
TIME TO MAKE: 5 MINUTES; 24 HOURS TO DRY
What’s not to love about this modern concrete and cactus combo? And, yes, you can make these artful pots! With leftover wet concrete from the candle project, fill empty yogurt cups and place an empty K-Cup holder in the middle. Let dry overnight then peel off the yogurt container (and recycle it!). Dig out the K-Cup inside. Let it dry a few more hours, then fill with a plant that loves arid climates, such as cacti or succulents.
From the Archives
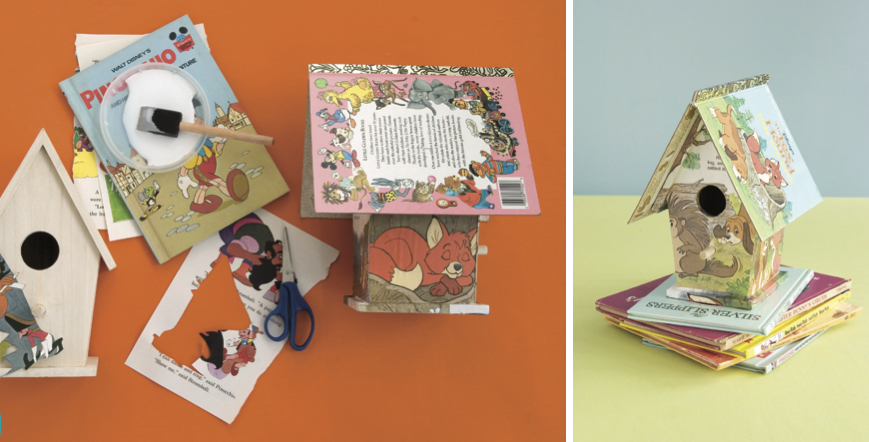
UPCYCLED BIRDHOUSE
Here’s an oldie-but-goodie craft from one of my books, “Simply Green Parties,” that remains a timeless favorite. It’s a storybook birdhouse.
This is a go-to craft for me whenever I want to make a decorative gift for a small child. Whether it’s for a birthday party or for a baby shower, this is a charmer. And it’s easy to make.
All you need is an unfinished wooden birdhouse, decoupage glue (I used Mod Podge in a matte finish), and an old storybook. To make it, generously spread glue all over the outside and layer on pages from the book. Cover the entire birdhouse (except the roof) and then spread glue on top of the paper to seal it into place. It’ll dry clear so don’t worry about being too neat and precise. Then tear out the remaining pages of the book and use the cover for the roof. Simply glue it right into place.