STORY BY SHELBY DEERING ✷ PHOTOGRAPHED AT RANCHO VALENCIA IN RANCHO SANTA FE, CALIFORNIA ✷ PHOTOGRAPHS BY JONAS JUNGBLUT
There is a myriad of woes that lead to way-too-tight muscles. Sitting in your desk chair all day. Training for a marathon. Stress. Or, maybe you simply want to loosen up in order to sink deeper into your yoga practice and take on more challenging moves?
That’s where a foam roller comes in. If you aren’t familiar with this simple yet powerful piece of fitness equipment, we’re here to clue you in with help from Erika Gibson, a yoga instructor at San Diego’s Five-Star, Five-Diamond Rancho Valencia Resort & Spa.
“I teach a foam roller/deep stretch class twice a week at Rancho Valencia,” Erika says. “We spend about 30 minutes foam rolling in preparation for a deep stretch.”
Experiencing loose, limber muscles seems to be even more readily achieved in the midst of serene surroundings. “Rancho Valencia’s yoga pavilion is a true sanctuary,” Erika says. “I honestly can’t think of a more peaceful space to take a foam-rolling class.”
Even if you aren’t able to jet off to this slice of paradise, you can still successfully use a foam roller at home. Erika explains that a foam roller is a lightweight, cylindrical, compressed foam bolster used for self-myofascial release. “They come in many sizes and firmnesses,” she adds. “If you are new to foam rolling, I recommend a more forgiving, softer roller to start.”
Benefits include increased range of joint motion, muscle soreness relief, prevention of overuse injuries, and improved muscle function.
Before you get rolling, Erika offers these words of wisdom: “Ease into areas of tightness and tension. Relax your muscles as much as possible. Spend more time on hot spots and knots. And drink plenty of water after you foam roll, like you do after a massage.”
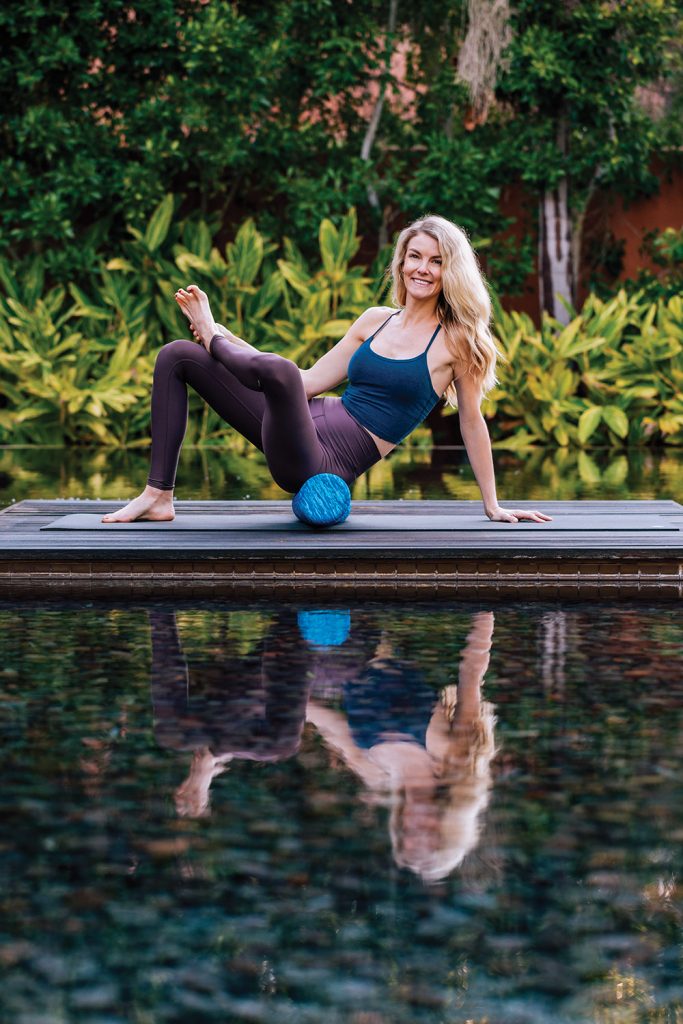
Outer Glute Roll
Instructions: Have a seat on your roller and cross your left leg over your right thigh. Lean your body weight onto your left glute, lifting your right hip higher than your left. Roll in a circular motion on your glute medius/piriformis, otherwise known as the deep upper and middle muscles of your glutes. Alternate sides.
Restorative Heart Opener
Instructions: Place the foam roller perpendicular to your spine, across the bottom tips of your shoulders. Place your arms behind your head and arch your spine over the roller. Relax your head into your hands. Take 10 deep breaths, feeling the front of your spine lengthen.
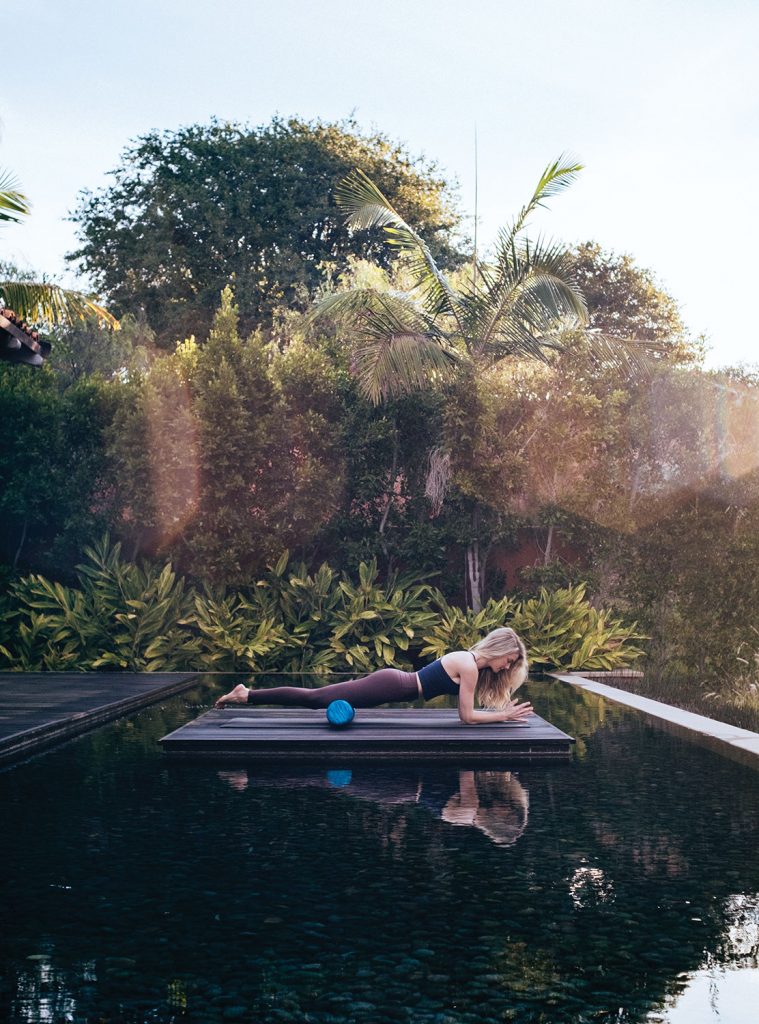
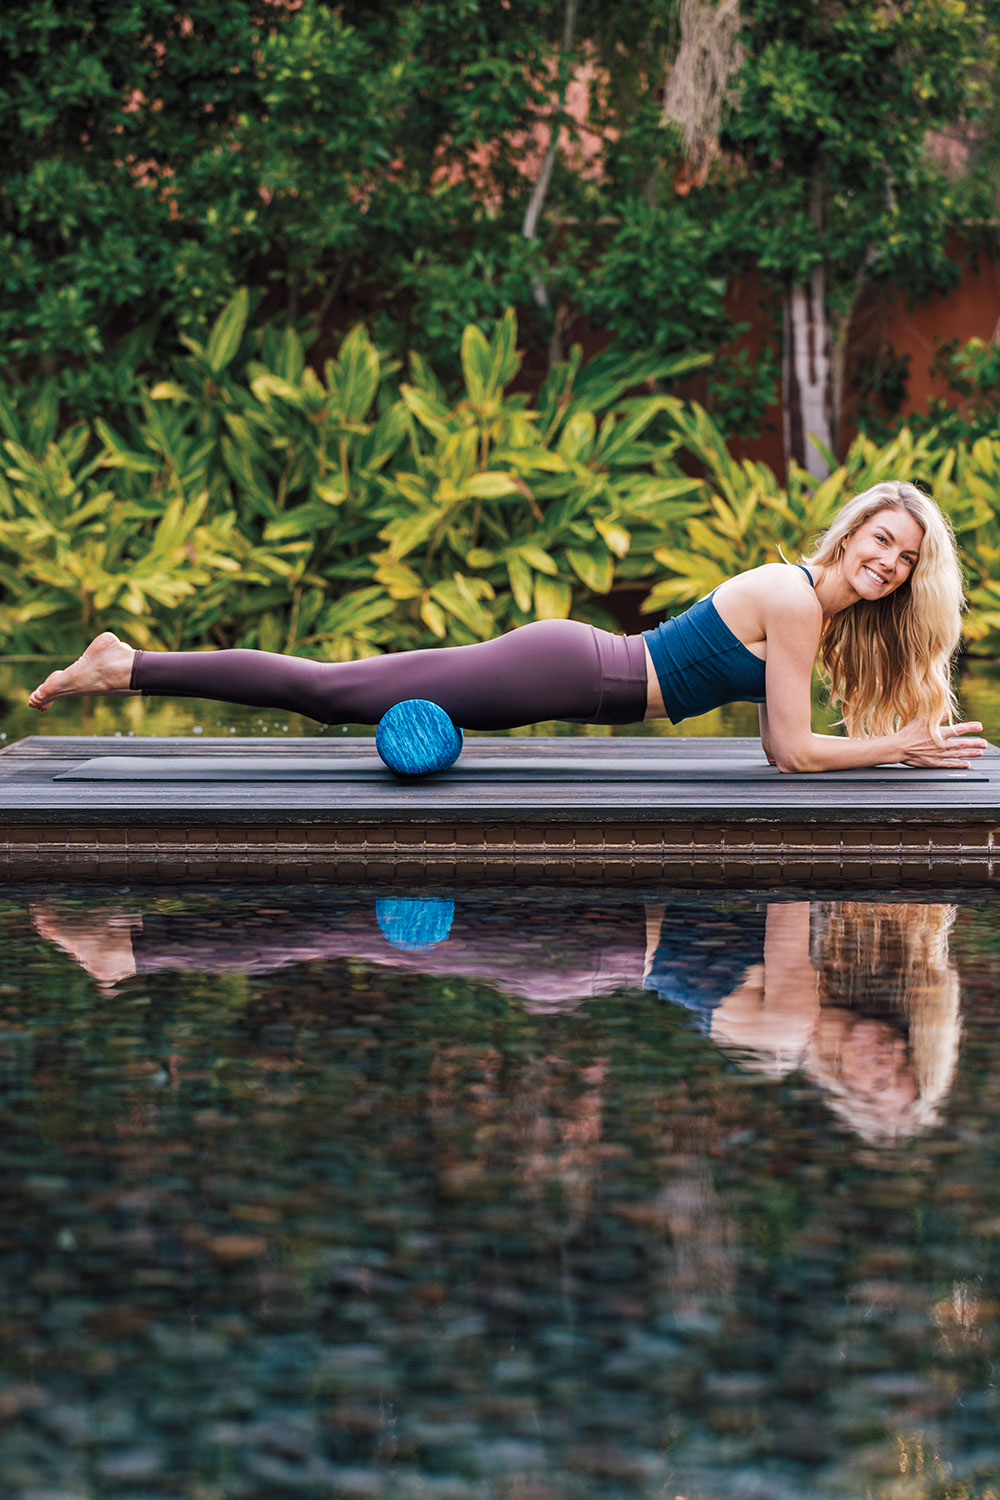
Quads Roll
Instructions: Start in a forearm plank with the foam roller perpendicular to your body resting between your thighs and the floor. You can roll both legs at the same time. Start right above your knee and roll up to your hips (avoid rolling over your knees). To access your inner thighs, turn your toes outward and heels inward. To access your outer thighs, turn your toes in and heels out.

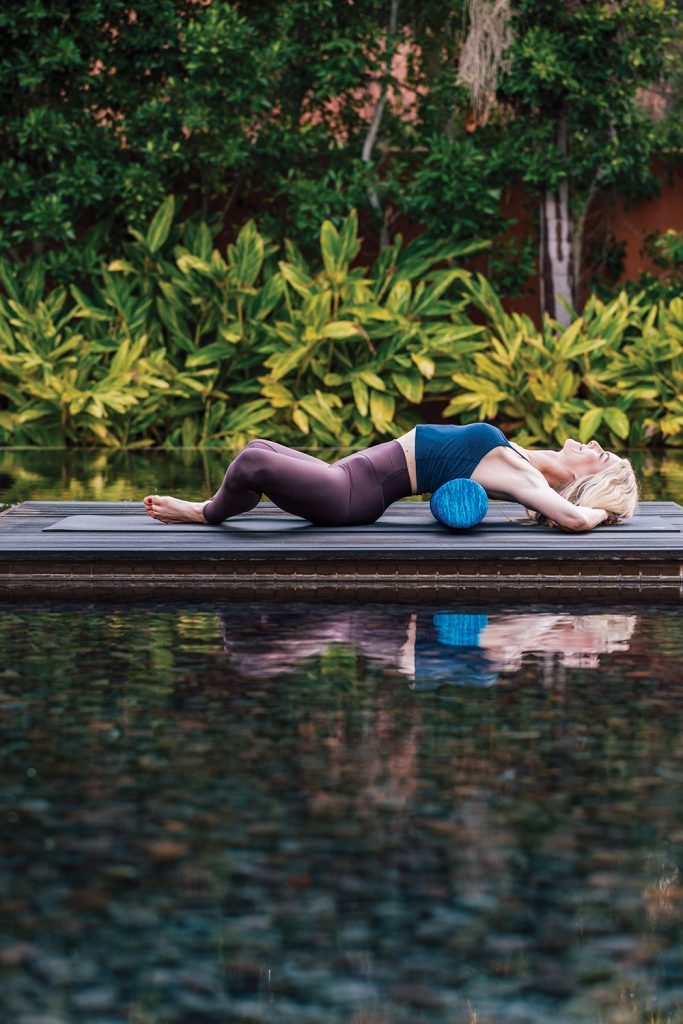
Traps/Shoulders Stretch
Instructions: Lie on your back with the foam roller resting in the curve of your cervical spine as if it were a pillow. Roll over onto your right side. Place your top hand on the roller. Bend your knees and lift your hips off of the ground. Shift your weight into the top of your shoulder area. Your head will be about an inch from the ground behind your roller. Roll left to right across your upper trapezius muscles.

Hamstring Stretch
Instructions: Sit on your roller so it’s perpendicular to your body. Place your hands behind you and glide your hips back so that the roller is behind your thighs. Roll to just above the backs of your knees and up to your sitting bones.

IT Bands Roll
Instructions: To stretch these tendons, start in a forearm side plank with the roller between your mid-thigh and the floor. Roll up and down the outer thigh. Stay above your knee and end at your hip.