122_129 Nature Crafts SHIP.indd
 Tattoo Rock
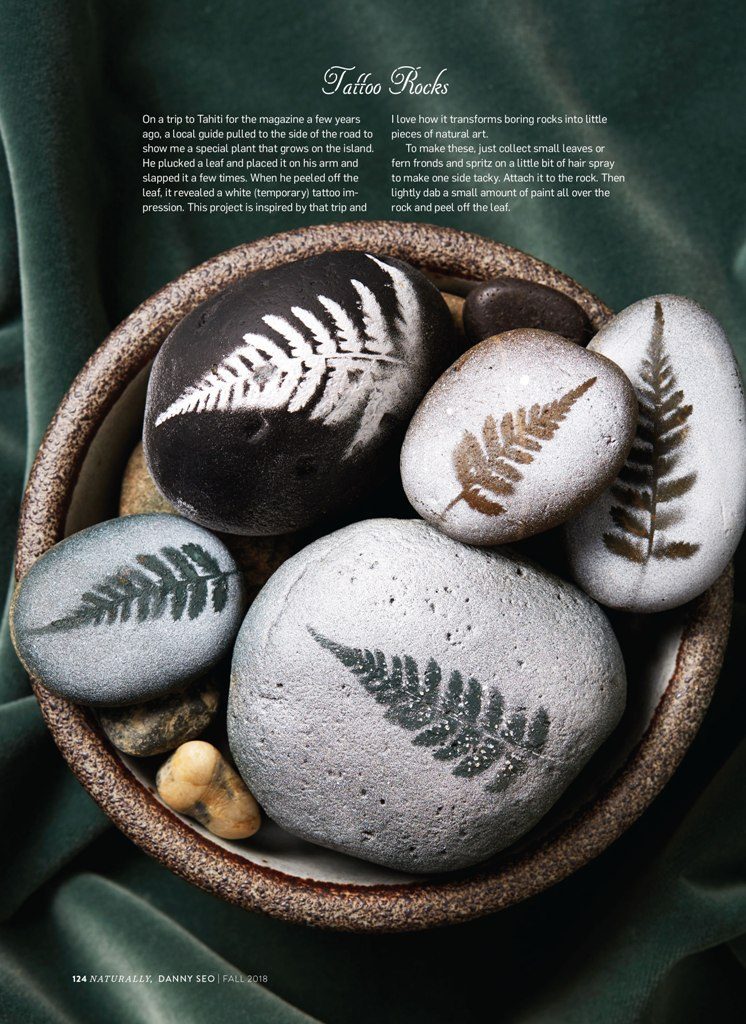
On a trip to Tahiti for the magazine a few years ago, a local guide pulled to the side of the road to show me a special plant that grows on the island. He plucked a leaf and placed it on his arm and slapped it a few times. When he peeled off the leaf, it revealed a white (temporary) tattoo impression. This project is inspired by that trip and I love how it transforms boring rocks into little pieces of natural art. To make these, just collect small leaves or fern fronds and spritz on a little bit of hair spray to make one side tacky. Attach it to the rock. Then lightly dab a small amount of paint all over the rock and peel off the leaf.
Garden Gorgeous
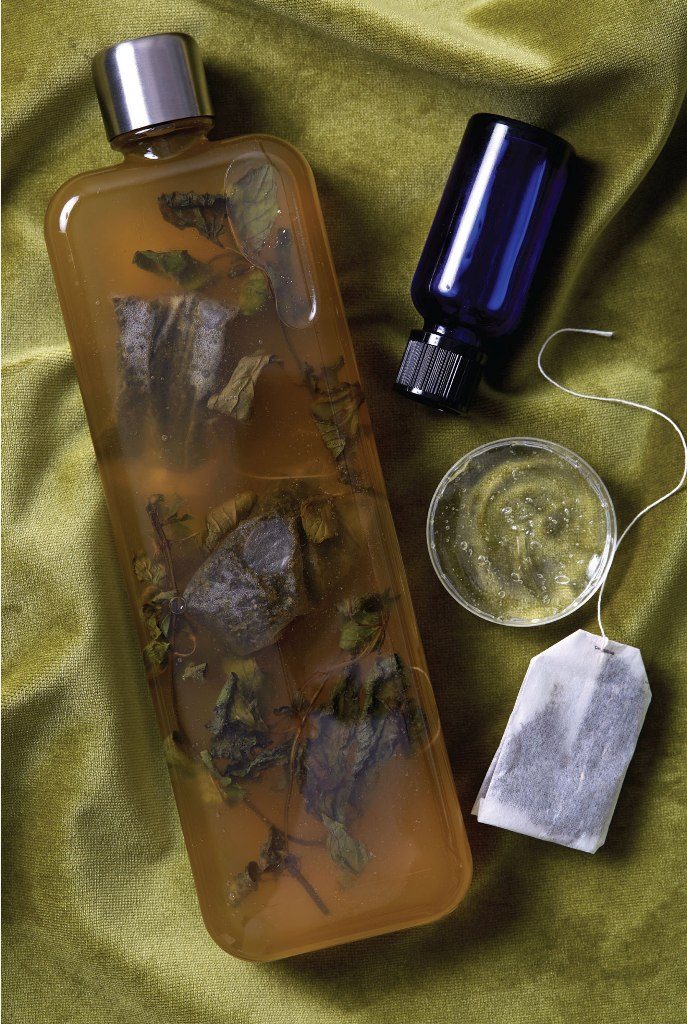
Okay, this is less about foraging in the woods and more about digging through your kitchen cabinets. (But if you have a wild amount of peppermint growing in your yard, forage away!) A lot of DIY skin-care recipes tend to disappoint, but this one’s a winner—it smells great, it’s cooling, and it just gives my tired skin a wake-up call whenever I use it.
GATHER
- • 1 teaspoon dried peppermint leaves
- • 4 teaspoons green tea leaves
- • 4 ounces distilled water
- • 2 drops of lavender essential oil
- • 2 teaspoons aloe vera gel
MAKE IT
Bring the water to a simmer and add the peppermint and green-tea leaves. (You can use loose leaf or bagged tea.) Turn off the heat and let it steep for about 10 minutes, then add the lavender oil. Let it cool and transfer the tea to a bottle; add the aloe vera gel. To use, just saturate a cotton ball and apply to your face. Store in the refrigerator to keep it fresh, where it should last for about a week.
Herbal Essences
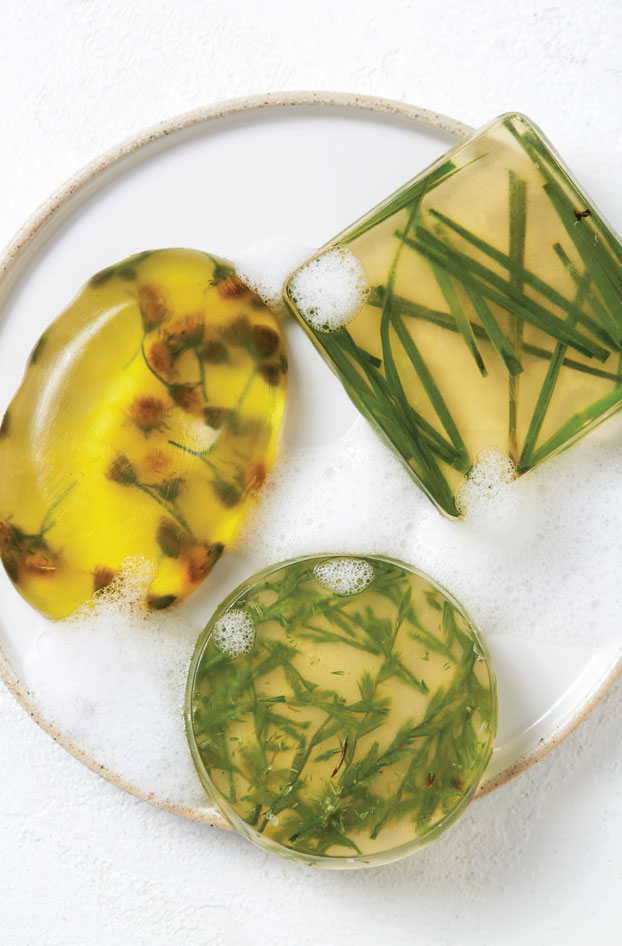
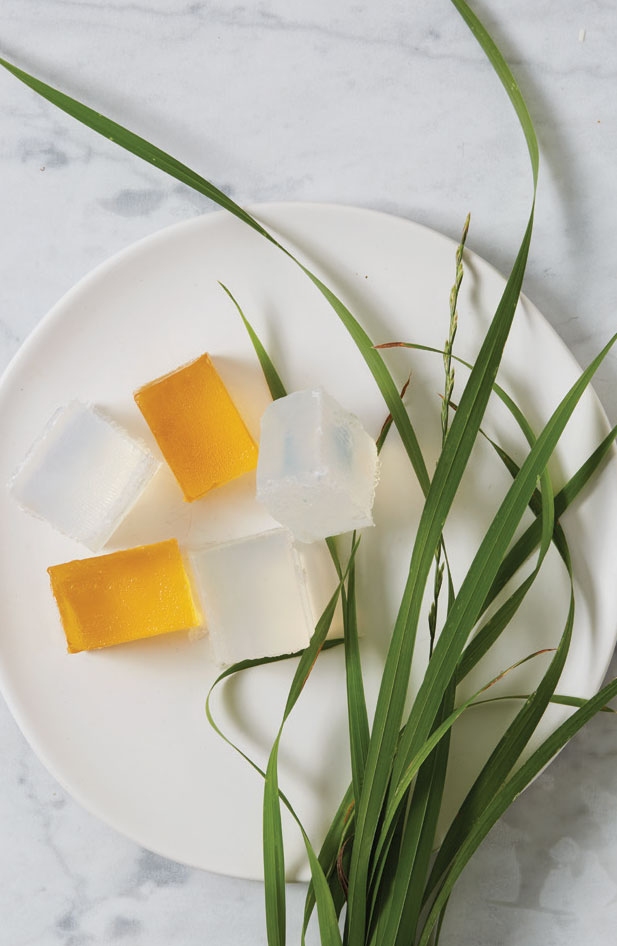
Clear glycerin soap and foraged natural materials from the yard are the hero ingredients for these amber-like bars of soap. This project is fast to make, but the results are fabulous.
To make, cut the glycerin soap into small cubes and place in a microwave safe measuring cup. Microwave for about 1 minute, stir, and repeat until the soap is completely melted. Using crafts-store soap molds or empty containers (such as heavy cream containers or juice boxes), drop in natural materials like pine or wildflowers. Pour the melted soap on top and allow it to cool before releasing from the mold.
Smudge Stick
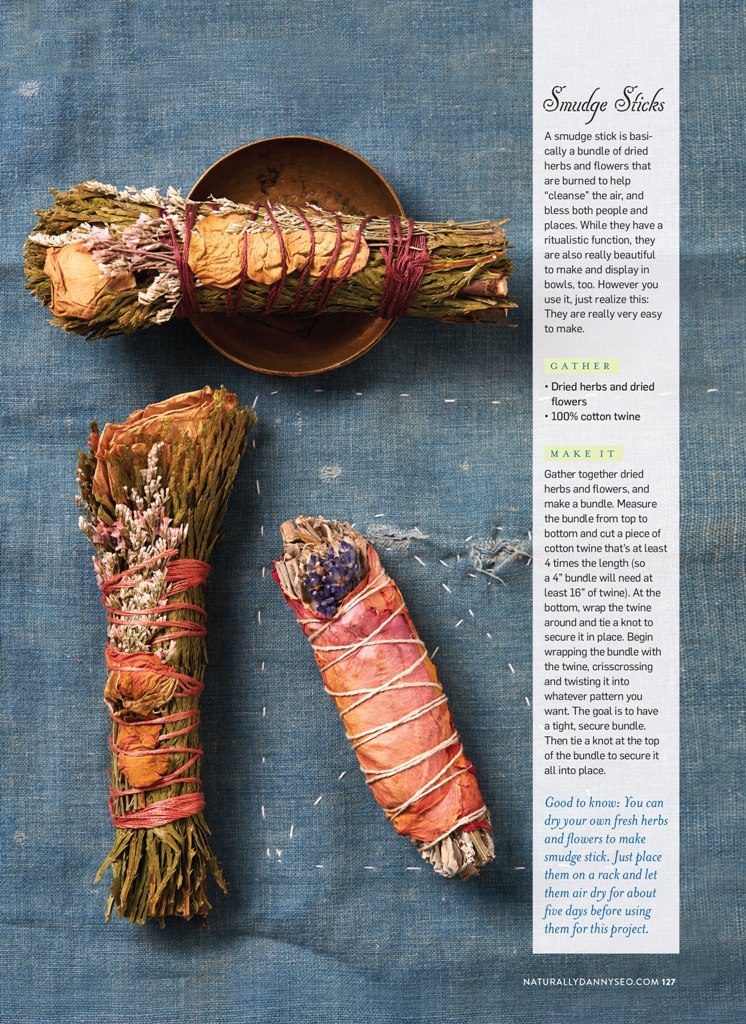
A smudge stick is basically a bundle of dried herbs and fl owers that are burned to help “cleanse” the air, and bless both people and places. While they have a ritualistic function, they are also really beautiful to make and display in bowls, too. However you use it, just realize this: They are really very easy to make.
GATHER
- • Dried herbs and dried fl owers
- • 100% cotton twine
MAKE IT
Gather together dried herbs and fl owers, and make a bundle. Measure the bundle from top to bottom and cut a piece of cotton twine that’s at least 4 times the length (so a 4” bundle will need at least 16” of twine). At the bottom, wrap the twine around and tie a knot to secure it in place. Begin wrapping the bundle with the twine, crisscrossing and twisting it into whatever pattern you want. The goal is to have a tight, secure bundle. Then tie a knot at the top of the bundle to secure it all into place.
Good to know: You can dry your own fresh herbs and fl owers to make smudge stick. Just place them on a rack and let them air dry for about fi ve days before using them for this project.
Leafy Gift Tag
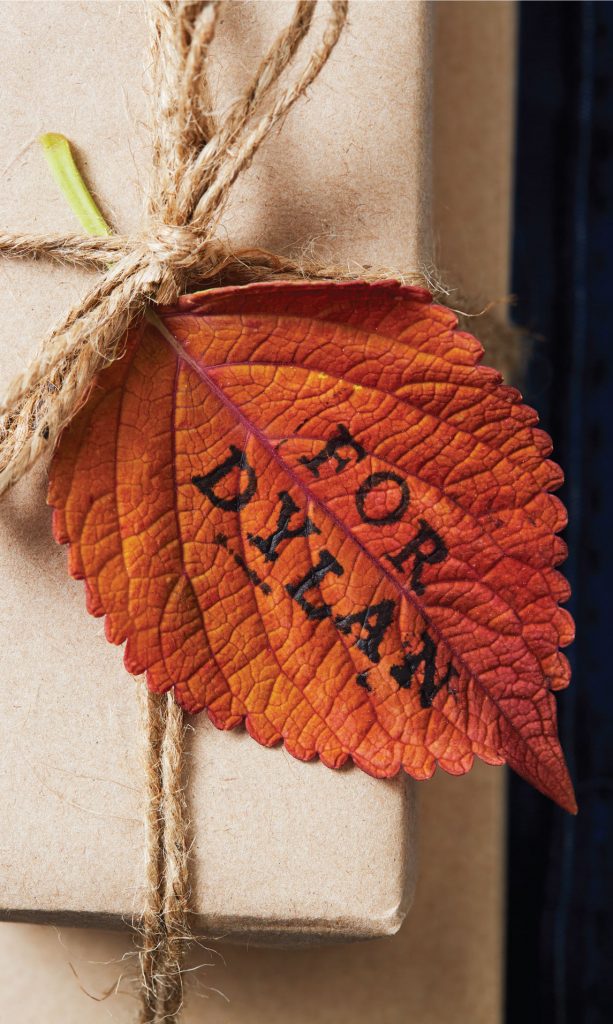
When I was putting together a last-minute gift for a party, I ripped open a grocery store brown paper bag and wrapped the present with the unprinted side facing out. Some leftover natural twine in the junk drawer became the bow. Then I realized I needed a gift tag! Instead of hastily writing a name on the present with a ballpoint pen, I plucked a leaf from the yard and stamped on the name using alphabet rubber stamps and an inkpad. Voilà! Leafy gift tags.
Good to know: Almost any plant material works well for this project, including large blades of grass.
Foraged Pebble Frame
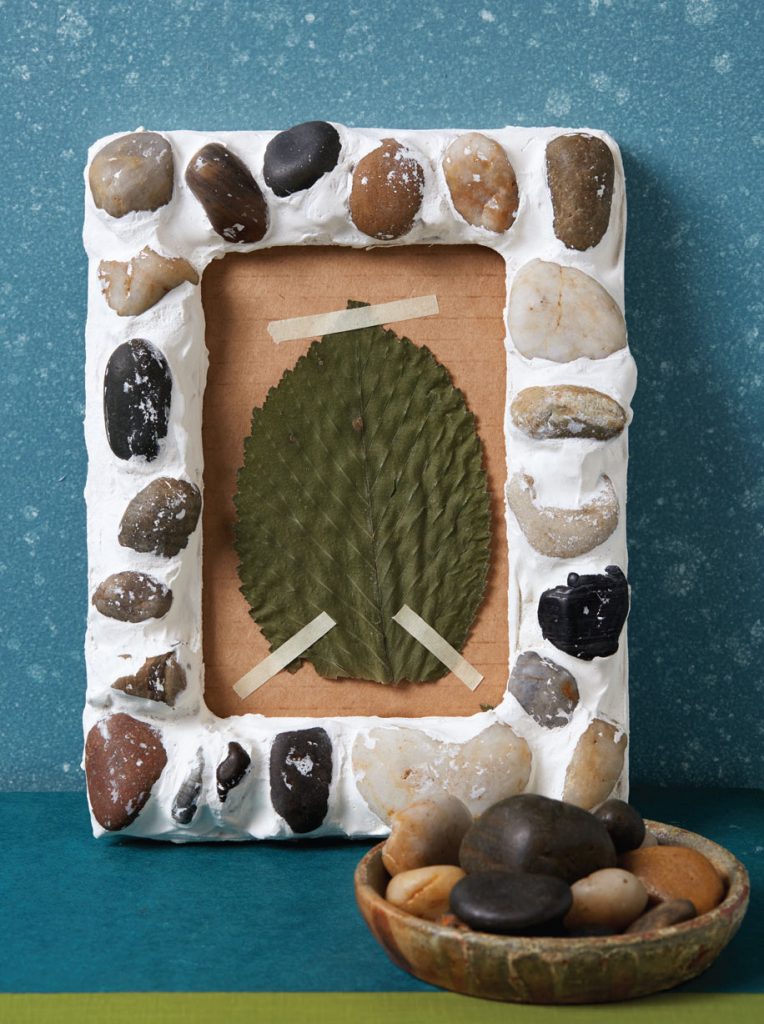
It feels like $1 unfinished wood picture frames are a craft store staple. This one upcycles these bargains, elevating them from something basic and bland into something handmade and special. Look for unique rocks or stones the next time you go on a hike or gather them from a special place so the frame has meaning to you.
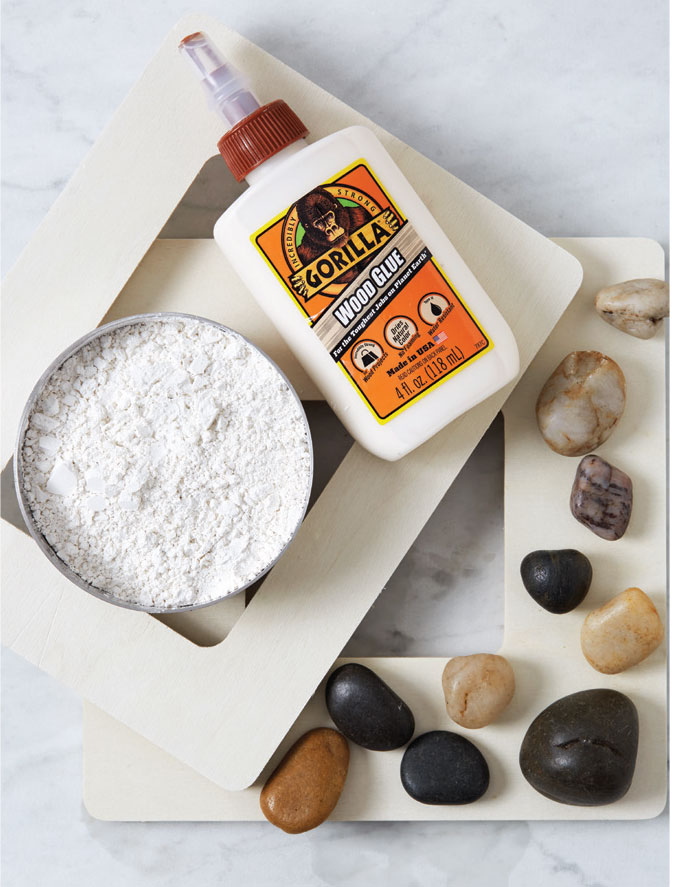
GATHER
- • Unfinished wood picture frame
- • Pebbles
- • Wood glue (I used Gorilla Glue)
- • Premixed grout
- • Sponge
MAKE IT
Position the small stones or pebbles on the frame in a pattern you like. Try to minimize the amount of exposed wood, but still leave space in between each individual stone. Glue each pebble onto the frame and let dry overnight (at least 12 hours). Using your fingers, spread the premixed grout onto the frame, taking care to fill in the exposed wood spaces, and along the sides and the inside portion of the frame. Try to avoid getting grout on the rocks. When finished, use a damp sponge to remove the excess grout off the stones. Allow to dry before using.
Good to know: You can also use seashells or sea glass instead of stones.
Ceramic Leaves
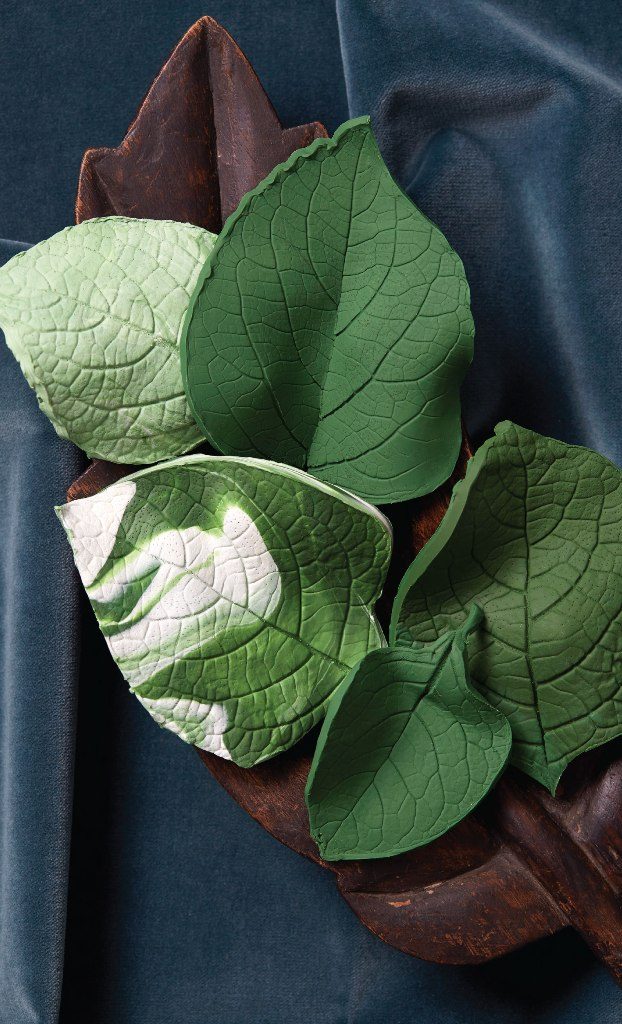
Here’s what I love most about this project: You end up with the most professional and artist-quality results, and the skill level to make this is basically zero. An inexpensive block of sculpting clay that bakes in the oven is really all you need to create these gorgeous leaves.
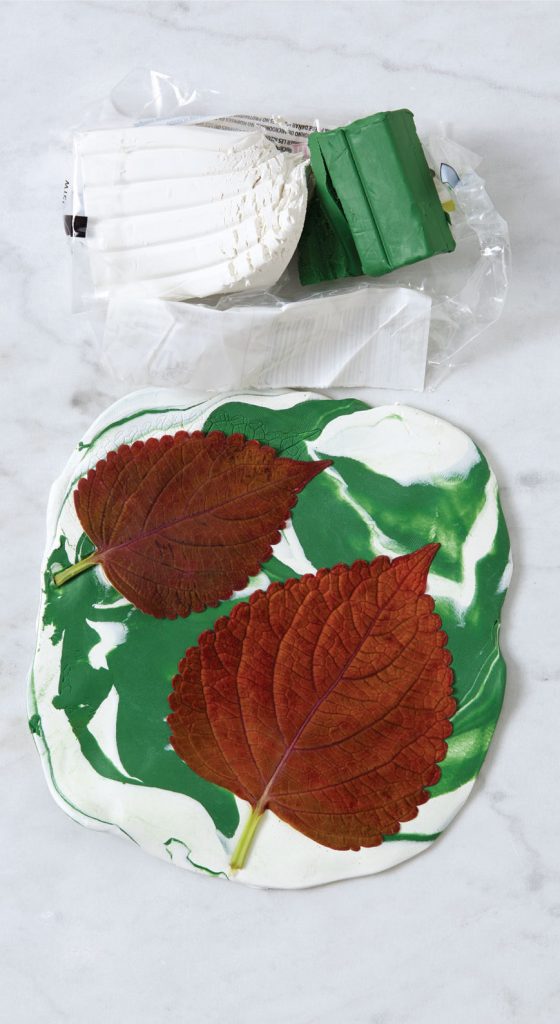
GATHER
- • A few blocks of Sculpey oven-bake clay (I chose a mix of pre-tinted green and white)
- • Leaves with raised veins
- • Knife
- • Bowl with wads of aluminum foil
MAKE IT
- Roll out your Sculpey clay on a flat surface; I used an old cutting board that I reserve just for crafting and grabbed an empty wine bottle from the recycling bin to use as a rolling pin. The clay should be about ¼-inch thick.
- Press a leaf into the clay with the raised-vein side down. Gently roll over the top to press the leaf firmly into the clay, without ripping the leaf. Peel off the leaf to reveal the impression. Use the tip of a knife to cut out the leaf and lift it off the board.
- To give the leaf a 3-D effect, drape it on top of a ball of aluminum foil and place it in an oven-safe bowl. Bake according to package instructions to set and harden the dough.
Good to know: To make a marbleized effect, tear two pieces of Sculpey clay and roll them together in your hands. Then roll it out to reveal the marbleized pattern.
Leafy Impressions
I’m always looking for crafty projects to make with my nieces and nephew, but it’s been a challenge to find something both a 3-year-old and a preteen could enjoy. I think this one hit the mark. While the finished project may look like a complicated art project, it’s really just about pressing a found leaf into aluminum foil to make an impression that’s fridge worthy.
GATHER
- • Leaves with thick veins
- • White craft glue
- • Aluminum foil
- • An old cardboard box
- • Matte black craft paint
- • Paintbrush
- • Steel wool
MAKE IT
Flatten the cardboard box and make small squares of cardboard that will fit one or two leaves on top. Spread some glue on one side of the leaf and position it on the cardboard square. Cover the exposed leaf side with aluminum foil and gently fold it back behind the square to secure in place. Use your fingers and gently press on the top of the foil to reveal a leaf impression. Paint the surface with one or two coats of black paint and allow to fully dry. Using a piece of steel wool, rub off the excess paint to reveal the leaf impression underneath.
Good to know: You can try other colors of paint for this project, but darker colors tend to have the best, most dramatic effect.
Good To Know:
- 1 Be mindful when foraging for natural materials from beaches. In many communities, it’s illegal to take shells, grasses, driftwood, and sand. But when it comes to sea glass, take as much as you want. It’s technically trash; sea glass is broken shards of glass tumbled smooth in the ocean.
- 2 After foraging in the woods, do a quick check for ticks on your skin. Also, toss everything you wore into the dryer on high for 10 minutes. The heat will kill any hidden ticks.
- 3 If any paint, glue or other nonbiodegradable crafting supplies get on your leaves or other natural materials, toss it in the trash. It’s not safe to throw paint- or glue-covered leaves back into the woods.
- 4 Old silk flowers and leaves are excellent materials to upcycle, especially for projects where you need impressions and not the actual specimen for the finished project.